Homemade Dog Breath Fresheners

Did you know that February is National Pet Dental Health Month?!?

There is a month, week, day for everything!

Obviously, it’s super important to take care of our dogs’ teeth. Oral hygiene is connected to so many other things like digestive and heart health. Plus no one wants their dog to have stinky breath!

I thought I would make something fun and yummy for our dogs that is both beneficial to them and us. Good breath and digestive health for them;  happy and healthy dogs for us!

I made these Dog Breath Fresheners with just a few ingredients, a food processor, and a ice cube tray. I used fun dog bone and dog paw ones, but a regular ice cube tray will work just fine. They are simple to make so you’ll be making them for your dogs all the time.

I bet they will love them as much as my dogs.

So what’s in these awesome Dog Breath Fresheners?

These whip up really quickly with plain yogurt, coconut oil, parsley, and mint.

The yogurt provides great cultures that help with digestion and good gut health. If your stomach is ‘off’ then there is a really good chance that your breath is stinky. Same goes for dogs, so some yogurt in their diet can be really beneficial.

Be sure to get sugar free, plain yogurt. (Note: The yogurt will have sugar in the nutrition facts, you want not ADDED sugar or flavorings)

Coconut oil is great for your overall health, but just focusing on digestion now, it helps with aiding in digestive disorders like inflammatory bowel syndrome and colitis, helps with nutrient absorption, and can help with killing parasites.

Parsley contains chlorophyll, which can help neutralize bad breath. Chlorophyll is a natural deodorizer so chewing some will help neutralize stinky breath odors. Potentially, it can even help with digestion, which will help address bad breath odors from the gut .

Mint leaves behind it’s signature fresh breath smell, but it does more than that! It helps with digestion and can help fight the bacteria in your dogs mouth that causes bad breath. As with parsley, mint contains chlorophyll, so that give it an extra boost in fighting off bad breath.

Be sure to give your dog lots of sweet kisses after they have a mint. xo

Homemade Dog Breath Fresheners

MAkes 20+ dog breath mints

Ingredients

  • Large bunch of parsley
  • 1 ounce of fresh mint
  • 1/2 Cup of water
  • 1/2 Cup of Coconut Oil
  • 1 1/2 Cups plain, sugar free yogurt

Process

  1. Trim off the bottom rough edges of the parsley and mint stems. (you can still have a lot of stems, just take off the rough, woody parts) Add to a food processor/blender
  2. Combine the coconut oil and water in a measuring cup/bowl. Microwave until warm enough to melt the coconut oil. Add to the food processor.
  3. Add the yogurt.
  4. Blend until the herbs are completely chopped.
  5. Pour into the ice cube molds. Freeze.


DIY- Painted Dog Treat Jars

Painted Dog Treat Jars

I love to craft and personalize the things in our home so I was eager to make some cute treat jars for our pups.

Painted Dog Treat Jars_01

I couldn’t decide on what to exactly craft so I made 3 different versions.

  • Opaque jar with drawn paw prints
  • Opaque jar with fun colors and a decorative dog figurine on top
  • Transparent jar with outlined painted bone design on it

Okay, so it turns out that I am horrible at painting dog bones, but it was still just so fun to craft! Also, why I roped my husband into making the paw prints on the white jar. ha!

There are so many options for this to stretch your creativity.

Painted Dog Treat Jars_02

Overall this was a fairly affordable craft since I already had paint brushes, dog figurine, and the adhesive. I already had the wide mouth canning jars and the plastic lid,  so I just needed to get the 1 jar for $6. While the paints and oil sharpie were new purchases, I can use leftovers for future craft projects.

I really encourage you to have fun and make your own design that suits you and your pup.

Painted Dog Treat Jars_03

A few things to keep in mind…

  • Do not paint the inside surface of the jar or lid. Multi-surface paints are non-toxic but they are also not food grade either, so it should not come in contact with food.
  • Do not paint the screw part of the lid as it will make it hard to properly seal the lid.
  • The kind of paint you use will determine the kind of coverage and look of the jar you will have. There are a wide variety of paints from satin finish to chalk finish to glitter.
  • Primer is not necessary but will help
  • Wait at least 1 hour, preferably several hours, between coats of paint.
  • Do not use a lot of pressure when using the oil based marker on top of the paint, it can pull of the paint.
  • Cure the jars in the oven, referring to these directions are helpful. (You can’t sure the paint on the lid if you use a plastic figurine!)

Now you are all ready to make you very own Painted Dog Treat Jar!!

Painted Dog Treat Jars_04

Painted Dog Treat Jars

Supplies Needed

  • Wide Mouth Pint Jars, or other preferred large wide mouth jar
  • plastic or metal lids (if you prefer not to use the 2 part canning lid)
  • Multi-surface Craft Paint/ Enamel Paint
  • Primer, optional: depends on the kind of finish you want (opaque)
  • stencils & painters tape, optional
  • Paint Brushes
  • small plastic dog figurine, optional
  • Contact Cement Adhesive, if using a figurine
  • Oil Sharpie
  • Mod Podge
  • isopropyl alcohol or white vinegar
  • paper towels

Instructions

  1. Thoroughly wash and dry your glassware. Wipe down with isopropyl alcohol or white vinegar. Set aside from 15 minutes to air dry.
  2. Plan out your design. You can free hand a design or use stencils. If using stencils, adhere to the jar with painters tape.
  3. Paint! Don’t worry about making a mistake as paint can often be removed by wiping it off right away with alcohol or gently scraping it off before it cures. Wait at least 1 hour between coats. If you paint another layer of paint on too soon you will risk taking the first layer off before it has completely dried and set.
  4. Follow the paint instructions for oven curing the paint.
  5. If you are adding a figurine to the metal lid, follow the directions of the compound cement to adhere it to the center of the lid. Let dry, according to the compound cement  instructions. Paint figurine and lid completely. Let dry and then finish with a layer of mod podge.
  6. If you are painting a 2 part canning jar lid or a solid metal lid, paint at least 2 coats. Let dry and then finish with a layer of mod podge. Then you have to glue the 2 pieces together with the contact cement. (If you don’t the twisting when you open the close the jar could cause the paint to be pulled off for the flat piece.)
  7. Fill the jar with yummy treats for your dog.

Tips

  • While multi-surface paints are non-toxic, they are not food safe. Do not paint the inside of the jar or lid.
  • Let the paint dry several hours between coats.
  • Do not use a lot of pressure if using an oil based permanent marker on top of paint, it can pull the paint off the glass.
  • Use the oven method to cure the paint vs letting it cure with time (21+days).

____________________

Products Used


Post contains affiliate links.

Join Us For National Walk the Dog Day!!!

National Walk The Dog Day is coming up this Thursday, the 22nd!!!

We want you to get up, leash up your pup, and take a fun walk with your favorite dog. It’s a great holiday to

Join us virtually by using #WalkTheDogDayFun. We are looking forward to seeing all your posts as you get out with your dogs.

Follow us all as we post IG Stories, on Facebook, & post to Instagram!

Kendall kicks things off in the UK, then we hop over to Bertram, Lucy, Bo, Kemper, & Brinkley on the East Coast. Maggie, Orbit, Sora, and Leo wrap up the day on the West Coast!

____________________

Click on the pictures to check out all of the Profiles


Training Our Dogs – The Power of “Place”

As we approach the 1 year anniversary of sending our dogs to, what I call, “doggie boot camp”, I have been reflecting on how that experience has so greatly impacted our family. It was a great investment in our dogs as it has made their lives, and ours, so much more enjoyable.

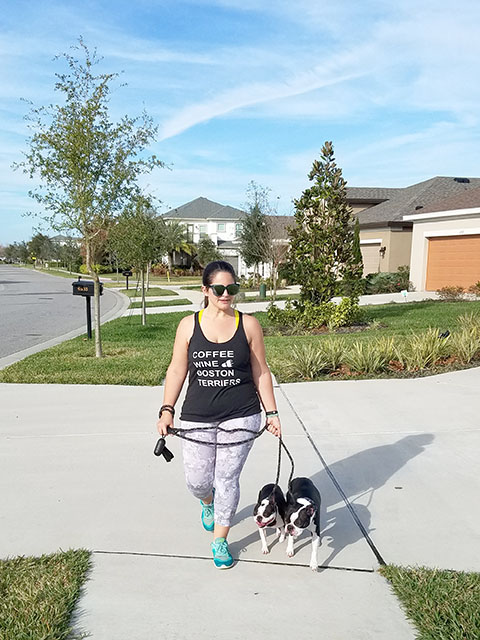
The goal was to have dogs that were better on leash – not barking, lunging at other dogs, yanking my waddling preggo butt off my super swollen feet (ugh!) – and having them calmer while at home when UPS rings our bell for packages, the delivery guy comes, or friends come over.

I turned to Tampa Bay K9 Solutions (TBK9S) for the dogs. Owner, Rick, addresses the issues that each dog has and customizes the 3 week long boarded program. He focused on the issues that  we discussed, as well as other general areas of training that Kemper and Brinkley needed handled. Like that Brinkley is a wiggle butt and struggles to sit.

They came back happy, focused, and ready to show off everything that they learned. I had never heard of “PLACE” prior to their training, but I was so happy that it was something that they were trained to do.

Besides having them walk amazing well on leash now, we are thrilled that we can have people in our home without them running to the door, jumping on them, and getting too wild around them. They sit there calmly as we have friends, family, and workers in our home. Because the dogs are calm when our guests arrive, they remain calm during their visit. We are then able to “FREE” them and they can then calmly interact with our guests.

The “PLACE” Command is the command that we use most often now as it really has changed our lives. We really think that all dogs should know this command.

What is THE “PLACE” COMMAND?

The “PLACE” command teaches them to stay ON a thing until you give the command to “FREE” them. It’s an advanced form of the “STAY” command, as it teaches them that they need to make contact to that “place mat”, so they can’t creep away from that place.

WHAT IS THE BENEFIT TO USING the “PLACE” Command?

The “PLACE” command is a great tool to keep a dog in a spot in and out of your house so that you can control the situation, like if someone comes to your house or if you want to go to a cafe with them.

Using “PLACE” is a great way of:

  • Keeping your dogs safe from running outside, like when you have a delivery come
  • Giving them a comfortable, quiet place to go
  • Keep them out of a space
  • Keep your dog from being under foot
  • Allowing people to enter your house without the dogs charging them
  • Creating a safe place for them in your home or in a public place

For us, having the dogs in “PLACE” while people come to our door or come in our house is a great way of controlling the situation. The door can be open without us fearing they will run out, people can get in the door and get their shoes off without dogs disrupting them, and the excitement of the new people can wear away and the dogs can be “FREE” once they see that there is no excitement or stress associated with this visitor.


WHERE is “PLACE”

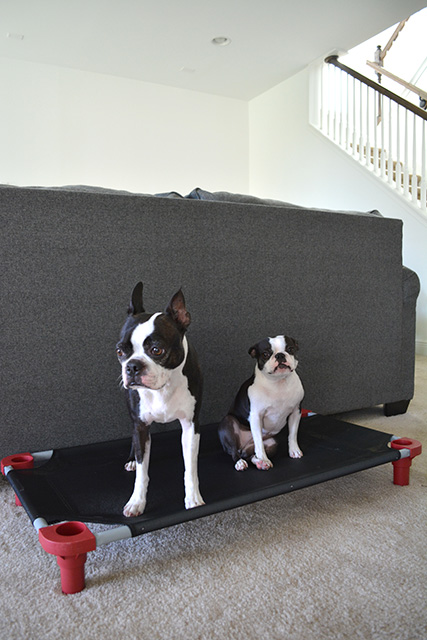
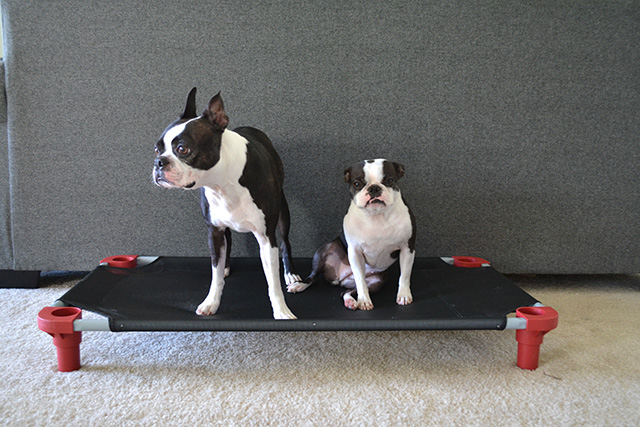
Rick uses a cot during his training program at TBK9S so he provided one for us to take home. The cot is a great way of designating that safe space for them.

We keep the cot in our living room, but in reality “PLACE” can be a blanket, towel, bathmat, or dog bed. We prefer to use the cot so the dogs clearly understand that we want them to stay there when we say “PLACE”, and not be confused with when we tell them to go to their beds.  (We tell our dogs “House Time!!!” and they go to beds in their crates.)

While on pack walks, Rick would give the “PLACE” command to the dogs on various things, like benches, to drive home the fact that “PLACE” is the command to stay in a spot/on the thing that we tell them, not just the cot, where they have been trained.

While at Tampa Bay K9 Solutions’ socializing events like “Yappy Hour”, we bring our cot with us so Kemper and Brinkley will stay on their cot during the event. They do well with the familiarity of it being their cot. As well, I like that it keeps them off the ground on a object that is fairly noticeable, reducing the chance of people from tripping over them.

How to get Starting Using the “PLACE” Command

It is ideal for your dog to have a basic understanding of the “SIT” and “STAY” commands, as the “PLACE” command builds upon it, but you can incorporate this into their training as they learn those commands as well.

You will need:

  • A “place”  – cot, mat, towel, bed, etc
  • Collar
  • Leash
  • Treats

Leash your dog, and bring them to their mat and say the “PLACE” command. Give them a treat to identify the good behavior of going there. You can reinforce that they need to “stay” there by saying the “STAY” command, but it is really important to focus on the “PLACE” command.

When your dog goes off the mat, bring them back to the mat and say “PLACE” again. Continue to reinforce the good behavior of them going to the mat and staying on there.

Rick taught me that it’s not important what they do while on the mat – stand, sit, or lay down. it’s just about them staying on it. Typically, the dogs do just lay down on their own, without my prompting them, by using the “DOWN” command.

Of course your dog doesn’t understand that they are required to stay in “PLACE”, so they will get off the mat. Calmly, bring them back to the mat and give the “PLACE” command again.

Keeping “PLACE”

As your dog is learning the “PLACE” command, extend the amount of time that they are holding place. From a few minutes to 10 to 15 to 30 minutes.

Besides just keeping place in your home, start by making your dogs hold place in public. Go to the park, go to your local coffee shop, check out a dog friendly restaurant. Bring your cot or whatever you use as your “PLACE” so they have a familiar piece of equipment to start with. Then you can try out other things, like a bench.

Releasing from the “PLACE” Command

While you are teaching them this, it’s also important to teach them that they are only allowed to get off the “PLACE” command by hearing the “FREE” command.

As we have 2 dogs, we say their names and then the command “Kemper! FREE! Brinkley! FREE!”

Tips for using the “PLACE” Command

Like any training, consistency is key. Practice this command even when you don’t need your dogs to sit there.

Give lots of praise and reward their good behavior with vocal, physical, and edible rewards. When they break the command, correct them calmly by bringing them back to their cot/mat and calmly repeating the command.

Your dog should be leashed while out of the house, like when going on a walk or doing to a dog friendly restaurant, but you can even leash them at home while they practice the command or are using it while someone is coming into your home.  Looping the leash on the leg of the cot is helpful as a backup way of grabbing them if they break the command. Plus, no one likes o drag a lot along with them.

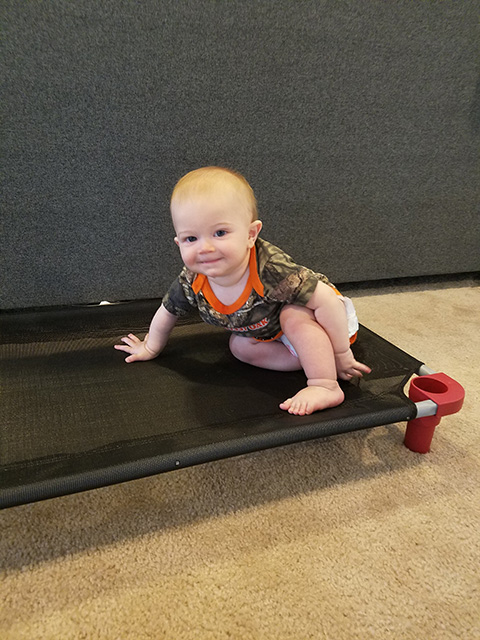
And if all else fails… kids like place too! ha!!

___________________

I am providing guidance and basic instruction that I have learned through reading and one on one instruction related to the training our dogs have received. As always, it is best to consult with a professional related to the health, wellness, and training of your dog(s).


Finding The Best Food Bowl for Your Dog

Fellow Boston Terrier owners can relate when I say “pee-yew!”

Boston Terriers are know tooters. They can clear a room with their toots.

There are several factors that cause these stink bombs from diet, stress, anatomy, etc. Even the food bowl that they eat from can effect how much air they in take while eating, resulting in toot toot toot.

There are all different dog feeders out there that can help reduce the amount of air your dog gobbles up while they eat their food.

Angled dog bowls helps position the food at a better angle, making it more ergonomically correct for your dog, keeping them in a position that reduces air intake that is associated with flatulence.

“Slow feeders” or “Busy bowls” are bowls that help slow your dog down, instead of taking in a lot of air while they are scarfing down their food. These bowls are great if your dog also eats too quickly and then throws up from that.

Over the years we have gone through several different kinds of bowls.

Plastic bowls- They were easy to take with us when we traveled but over time Kemper chewed them up.

Ceramic bowls- easy to clean, but they chipped over time. Plus, Kemper would bang it with his paw when he wanted food.  If he was really annoyed with the delay then he would knock over his water bowl for extra attention!

Slow Feeders – When Kemper was a puppy he thought they were a fun toys so he would chew on them while eating dinner. He ruined several.

Ultimately, we found that elevated dog feeders worked well for both Kemper and Brinkley.

Besides, reducing the toots, it is argued that elevated bowls can be really helpful in reducing the possibility of developing Gastric Dilatation Volvulus or “GDV”, commonly known as “Bloat”. They are also great for dogs with arthritis, neck or back problems.

Specifically for us, they helped reduce toots, Kemper couldn’t bang them, and Brinkley could easily eat out of them with her short little legs.

You know those videos of puppies that are eating on a plate and flip forward since they are bent forward… yep, Brinkley used to do that before we got these elevated feeders.


We fell in love with our elevated feeders

Our elevated bamboo feed stations are perfect for Kemper and Brinkley!

They are sleek and modern looking so they fit in well with our decor. The bamboo

I like that they are easy to clean. The stainless steel bowls are can go into the dishwasher. You just need to do a quick wipe-down on the feeder. Don’t let water pool on it as it can cause the bamboo to discolor and potentially grow any mold.

Both dogs are comfortable using them. These come in a variety of heights, but the 4″ high feeder is great for this smaller breed dog.

Their set came with 4 bowls in 2 different sized bowls (1.5 cups and 2.5 cups). We used the smaller bowl for food and the deeper bowl for water. The extra bowls are great to have on hand when you are washing one set.

Is it time for you to try a different bowl for your dog?

If you are interested in trying the elevated feeders from Pawfect Pets that Kemper and Brinkley have, then use coupon code “FEED20PF” for 20% off!!

____________________

As always, consult with a veterinarian in matters of health, wellness, and safety so they can assist you in providing the best care for your dog.  

___________________

Post contains affiliate links